通过SCL安装Ruby 2.3
jekyll需要ruby 2.1+,所以使用SCL安装ruby 2.3:
# 1. Install a package with repository for your system:
# On CentOS, install package centos-release-scl available in CentOS repository:
yum install centos-release-scl

# 2. Install the collection:
yum install rh-ruby23 rh-ruby23-ruby-devel

# 3. Show available connections
scl --list
jekyll安装
# 1. 启用 ruby2.3环境
scl enable rh-ruby23 bash

# 2. 安装jekyll及插件
gem install jekyll jekyll-paginate jekyll-seo-tag

# 3. 打包
cd myblog && jekyll build
jekyll主题
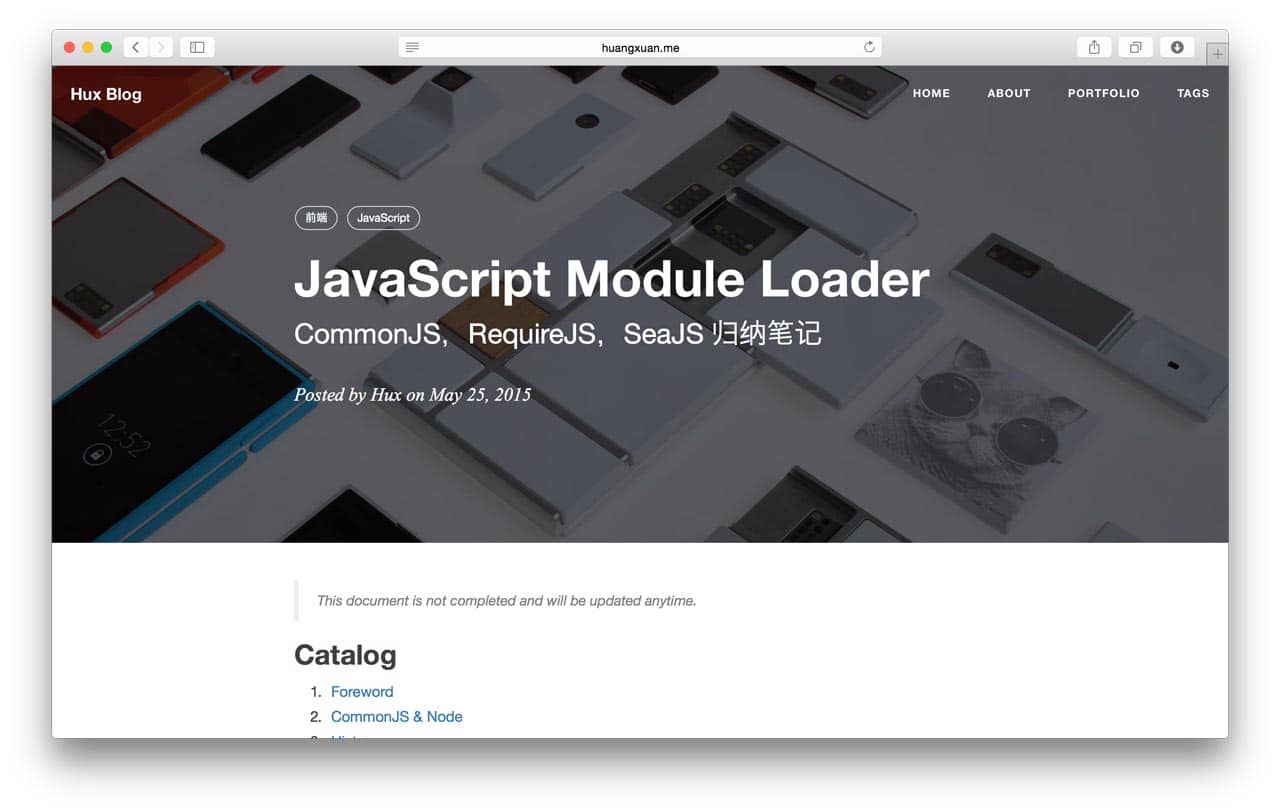
我们使用的主题来自 huxpro.github.io,并做了定制 可以从github下载,效果图如下:
编译和预览
jekyll默认生成的静态文件在_site目录,可以用下面的命令预览,该命令会在本地开启8000端口的http服务。
cd _site && python -m SimpleHTTPServer
nginx服务设置
#安装nginx
yum install -y nginx

#创建nginx的root目录
mkdir -p /var/www/html

#设置nginx根目录对于git服务可写
chown -R git.git /var/www/html
# /etc/nginx/nginx.conf
#
# For more information on configuration, see:
#   * Official English Documentation: http://nginx.org/en/docs/
#   * Official Russian Documentation: http://nginx.org/ru/docs/

user nginx;
worker_processes auto;
error_log /var/log/nginx/error.log;
pid /run/nginx.pid;

# Load dynamic modules. See /usr/share/nginx/README.dynamic.
include /usr/share/nginx/modules/*.conf;

events {
    worker_connections 1024;
}

http {
    log_format main     '[$time_local] $remote_addr $server_name "$request" '
                        '$status $body_bytes_sent "$http_referer" '
                        '"$http_user_agent" "$http_x_forwarded_for" '
                        '$upstream_addr $request_time $upstream_response_time';
    #log_format  main  '$remote_addr - $remote_user [$time_local] "$request" '
    #                  '$status $body_bytes_sent "$http_referer" '
    #                  '"$http_user_agent" "$http_x_forwarded_for"';

    access_log  /var/log/nginx/access.log  main;

    sendfile            on;
    tcp_nopush          on;
    tcp_nodelay         on;
    keepalive_timeout   65;
    types_hash_max_size 2048;

    include             /etc/nginx/mime.types;
    default_type        application/octet-stream;

    # Load modular configuration files from the /etc/nginx/conf.d directory.
    # See http://nginx.org/en/docs/ngx_core_module.html#include
    # for more information.
    include /etc/nginx/conf.d/*.conf;

    server {
        listen       80 default_server;
        listen       [::]:80 default_server;
        server_name  _;
        root         /usr/share/nginx/html;

        # Load configuration files for the default server block.
        include /etc/nginx/default.d/*.conf;

        location / {
            root         /var/www/html;
        }

        error_page 404 /404.html;
            location = /40x.html {
        }

        error_page 500 502 503 504 /50x.html;
            location = /50x.html {
        }
    }
}
git服务设置
# 添加git用户, 并将shell设置为git-shell
useradd git --shell /usr/bin/git-shell

# 创建git仓库
mkdir -p /home/git/blog.git
git init --bare /home/git/blog.git
chown -R git.git /home/git/blog.git

#!/bin/bash
# hooks/post-receive

scl enable rh-ruby23 - << \EOF
git clone /home/git/blog.git /tmp/tmp-blog-build-repo
jekyll build -s /tmp/tmp-blog-build-repo -d /var/www/html
EOF

rm -Rf /tmp/tmp-blog-build-repo
exit