因为比较新的Macbook都是配置的AMD显卡,tensorflow还不能支持,所以整个计算必须依靠CPU来完成,虽然我们也可以在Mac OS使用pip来安装tensorflow模块,但是默认的tensorflow在编译中没有开启AVX和FMA编译开关,所以在执行程序的时候可以注意到类似下面的警告。
W tensorflow/core/platform/cpu_feature_guard.cc:95] The TensorFlow library wasn't compiled to use SSE4.2 instructions, but these are available on your machine and could speed up CPU computations.
W tensorflow/core/platform/cpu_feature_guard.cc:95] The TensorFlow library wasn't compiled to use AVX instructions, but these are available on your machine and could speed up CPU computations.
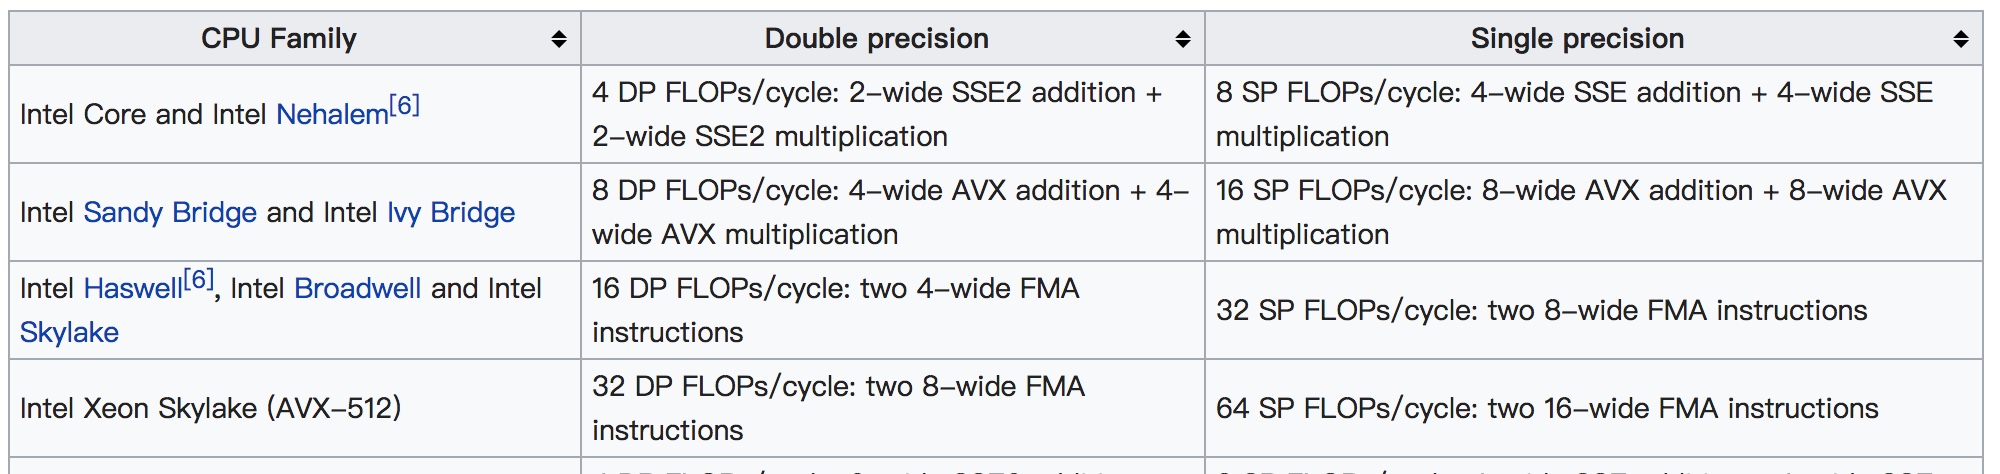
SSE,AVX,FMA都是Intel用于加速浮点计算的SIMD指令集,比如AVX将浮点能提供256位的浮点寄存器,所以1指令周期内能做256/32=8次浮点运算,而FMA可以额外的在一个指令周期内完成a*b+c的融合乘加运算,等于2次浮点运算,下面的表格给出了Intel不同的CPU SIMD加速能力,比如现在都算比较古老的Haswell处理器(V3)上,如果使用了SIMD, 我们可以得到32倍的性能提升,在没有GPU加速的情况下,反正我是不会放过它的。
安装过程
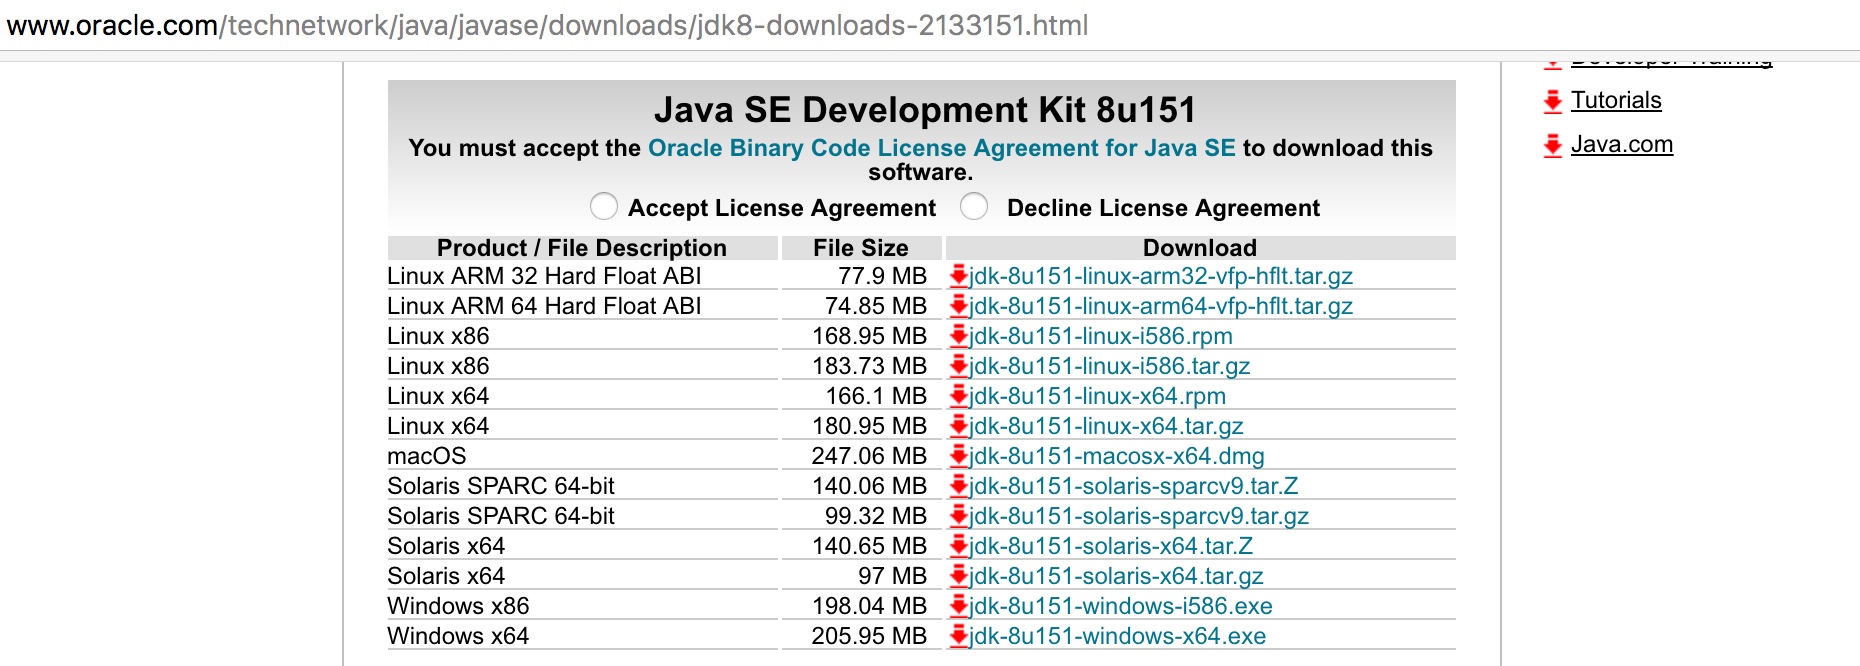
1. Install JDK 8
Mac OS的JDK可以到Oracle JDK网站下载安装:
2. 安装Homebrew
homebrew是mac os的神器,有了它,几乎所有linux上的软件包都可以方便的在mac os上安装, homebrew的安装一般就是一条命令:
/usr/bin/ruby -e "$(curl -fsSL \
https://raw.githubusercontent.com/Homebrew/install/master/install)"
3. 安装bazel, git
brew install bazel git
4. 获取tensorflow源码
git clone https://github.com/tensorflow/tensorflow
5. 安装依赖的python包
sudo pip install six numpy wheel
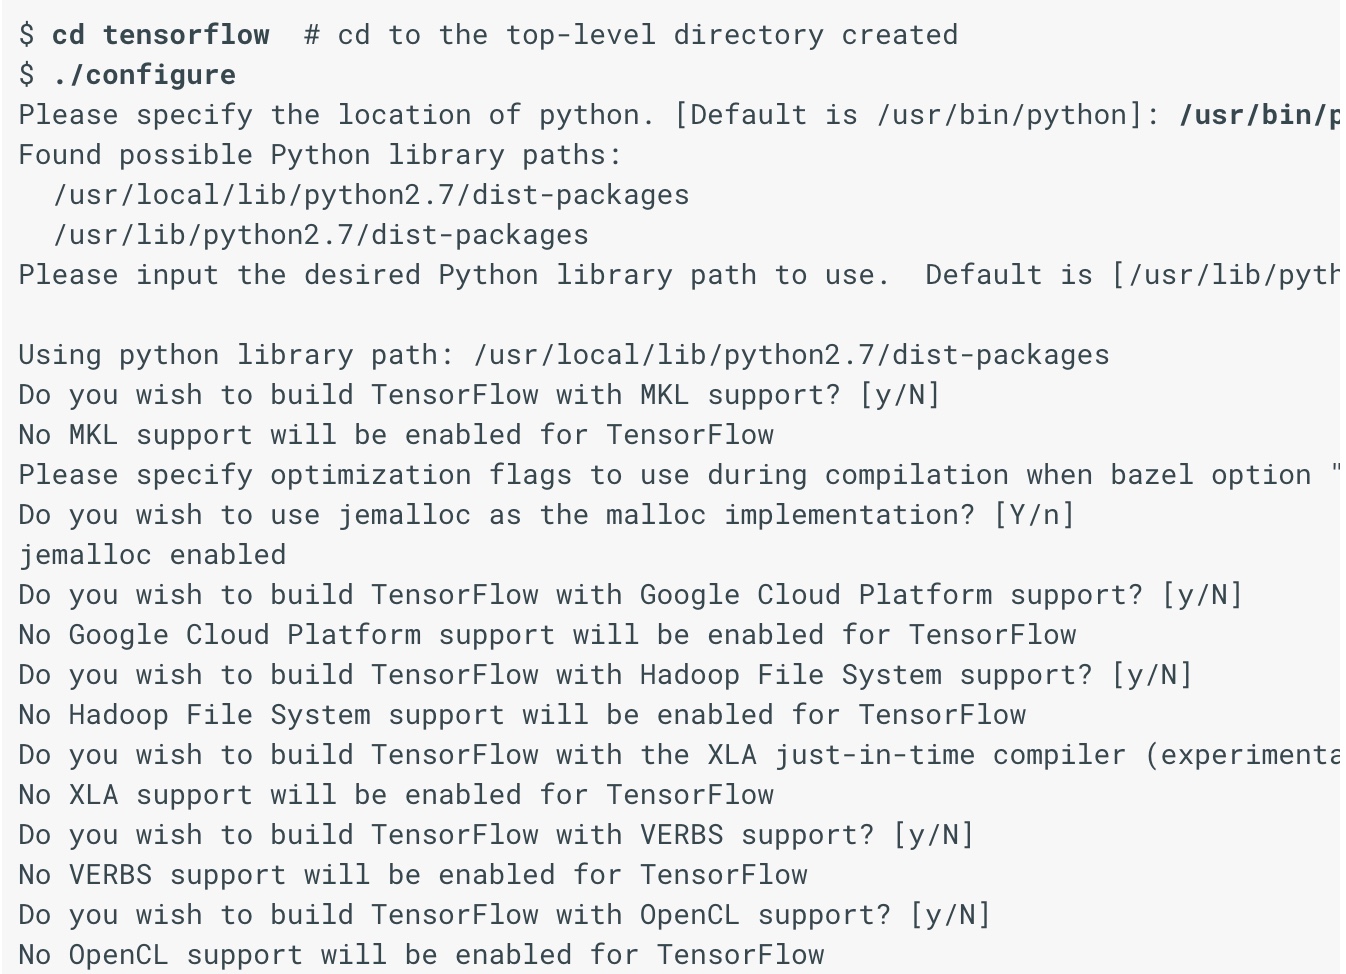
6. 配置编译选项
这里我们基本可以一路选择N下去,特别是opencl和cuda选项,一定要选择N。
7. 编译tensorflow
编译成功后,会在/tmp/tensorflow_pkg目录中生成安装包。
bazel build --config=opt //tensorflow/tools/pip_package:build_pip_package
bazel-bin/tensorflow/tools/pip_package/build_pip_package /tmp/tensorflow_pkg
8. 安装tensorflow
sudo pip install --upgrade /tmp/tensorflow_pkg/tensorflow-1.4.0-xxx.whl
验证
写一个下面的小程序,用python执行以下,会发现刚才的SSE, AVX警告没有了。
# Python
import tensorflow as tf
hello = tf.constant('Hello, TensorFlow!')
sess = tf.Session()
print(sess.run(hello))